Thursday, June 30, 2016

Southern Belles: Recipe

Remember when I teased you about when I was going to give you this recipe?  Well here it finally is!

Some of you reading this might remember when I first made these cookies from an old recipe I found in a magazine; well here is my modified version to share with you.

The name sounds so fancy, yet they aren't hard to make.  Some precise measuring, time, and an 8 by 11 inch pan is all it takes.  You don't have to be a baking guru to get these right.


The Ingredients:

  • 3 Tbs. butter
  • 1 cup of sugar
  • 2 eggs ( save one egg white for sugar topping )
  • 1 1/2 cups of flour
  • 1 tsp. baking powder
  • 1/2 salt
  • 2 Tbs. heavy whipping cream
  • 1/2 tsp. lemon juice
  • 1/2 tsp. vanilla


For the Sugar Topping:

  • 1 egg white, beaten
  • 1/2 white sugar
  • 1/4 brown sugar
  • pinch of cream of tartar
  • 2/3 cup shredded coconut


We're going to mix the cookie dough first, pre-bake it a bit, then put the topping on, well, top of it and finish baking the whole thing.

( I wish to apologize in advance for the horrible lighting in my kitchen. Please bare with me, the cookies will be worth it in the end, I promise. )

Preheat you're oven to 325 degrees ( fahrenheit ).


It starts out just like any other cookie recipe, by blending the butter and sugar together.  It'll be a sandy looking, because of how little butter there is compared to how much sugar there is.  Just make sure that there aren't any big clumps of butter hanging out in your mixer.


Put your eggs in next, saving one of the egg whites for later.  I find the best way to do this is to crack the egg into your hand and let the white slide through your fingers.  Mix till smooth.


The flour, baking soda, and salt get sifted right into your mixer bowl...


...and the heavy whipping cream, lemon juice, and vanilla get splashed right on top of that airy pile when you're done sifting.  All these things get mixed in at once, till it all comes together into a nice looking dough.


Time to get this dough into the pan.


I use an 8 by 11 inch pan to get my desired thickness.  The dough will spread out to about 1/4 of an inch thick.  Make sure you spray the pan so that the cookie doesn't stick!  Use a spatula for the spreading, wetting the back of it every few spreads to keep the dough from sticking to it.  Make it as uniform as you can.  You don't want one end to be much thicker than the other, or else it'll bake a bit funny.

When you're satisfied with your spreading, pop it into the oven for 15 minutes.

While it's baking, it's time to mix up that sugar topping.


Toss the egg white, white sugar, brown sugar, and the cream of tartar into the mixing bowl and beat it on high.  Please note: this is not a meringue.  But the egg white will expand a bit to give you more topping.  Continue beating it for about three minutes.  You should have a nice, smooth, sugary mixture in your bowl.


Dump your coconut in and mix on high for another 2 minutes.


The topping should look something like this when it's done.

And now we wait for the cookie in the oven to be done baking.

When you do finally take it out of the oven, let it cool for 5 minutes before you put the topping onto it.


The topping doesn't need to spread, and I wouldn't recommending trying to anyways because you'll end up ripping your cookie ( not that I ever did that, of course ).  It's one of those nice, crumbly toppings that you can just sprinkle on the top of whatever you're baking.  So sprinkle away, creating an even layer all across the top of your cookie.

Then it's back in the oven for another 15 minutes.


When it's finally done baking, let it cool completely before cutting and eating.  If it's still warm it'll wanna rip coming out of the pan.  The best way to cut it, I think, is in squares, and small ( -ish ) ones at that.  It's a very rich cookie, crunchy on the top, and chewy underneath.


I bet you'll feel super fancy after making these.  They've got a fancy name and they look like the perfect victorian tea party treat when they're all cut into neat little squares and arranged on a little plate.  I mean really, how could you not feel fancy after all that?  I, for one, feel the need to find a pretty white parasol to walk with after eating just one square.

You'll be hooked on these cookies as soon as you take you're first bite, I guaranty it.  Just make sure you have people to share them with, though, because I would really hate to see you fall into a sugar coma after eating the whole pan by yourself.

Any questions?  Let me know in the comments below!  I would love to hear to from you, and please, do tell if you feel fancy after making them like I do!

Em  :)

Wednesday, June 29, 2016

Fun-tastic Cupcakes


My little sister was talking to me about something she had read in one of her books this morning when the word 'cake' was mentioned.  We couldn't get the thought of it out of our heads after that.  We could just imagine how nice it wold be to have a cake to eat, or cupcakes, for that matter.  Sweet, fluffy, and delicious cupcakes.

So we decided that we needed to make some.

More correctly, I found a recipe on Pinterest for made-from-scratch cupcakes and she made them for me.  Isn't she just the sweetest?


It was really fun to sit at the dinning room table ( to supervise, you know ) and watch her make these from scratch all by herself.  I was very proud, I have to tell you.  Reading the recipe and making the measurements with little input and advice from me.

While she was mixing and baking, I got to sit back and read.  Really, I can't see how the situation could have been better.  Having cupcakes made for me while I got to supervise and read, and read, and read some more to my little heart's content, knowing that I would have treats to eat at the end of it?  That must be what it feels like to have servants.

( Not that my little sister is my servant or anything.  At least, as far as she is concerned.  But not really.  Just joking.  Maybe.  Mostly.  )


And they weren't just any cupcakes, either.  They were funfetti cupcakes with chocolate sprinkles on the top ( I pinned the recipe here to my Yummy Foods board, if you would like to make some yourself ).  We didn't have any powdered sugar for frosting, so we tossed the chocolate sprinkles on instead ( notice how I say we because supervising your younger sibling is really half of the work, you know ).


In the end they turned out great, even without the frosting.  She ( we ) did a great job making them.  I'm so proud of her ( us ).  This is why it's so great to have younger siblings.  You'll always have someone there to boss around I mean help you out and make you cupcakes for absolutely no reason other than the fact that they love you.

Seriously though.  My little sister's pretty great.


Em

Saturday, June 25, 2016

Birthday Buckets Of Fun

Last week it was my daddy's birthday; this week it is my mama's birthday.  I heard her get up early this morning, as is normally her custom.  I slept in for a bit, letting her enjoy the quiet house to herself for while.

 After a little bit, I finally wandered down the stairs to sleepily sing her happy birthday.  Then it was up to the kitchen, to get busy baking once again.  My original plan was to make her some Southern Belles for her birthday threat; but then I got to thinking about how delicious those skillet cookies I made for my daddy had tasted, and thought, "Well, why not make both?"

So I did.

These skillet cookies seem to be becoming a bit of a new tradition to make on birthday's in our house.  It's tradition that I would most certainly be pleased to have.


As for the Southern Belles, I spent the rest of the morning baking them up.  You will be pleased to hear that baking them was a bit of double mission.  The top reason was because my mama loves them.  But the second reason was so I could get pictures along the way to make you a post on how to make some Southern Belles for yourself.  That recipe will be up sometime next week, but I'm not telling you when exactly.  You'll just have to watch and see.

It was a quiet day, which is what my mama loves best.  She got yummy baked goods, help with the garden, and plenty of time to work on the dream that she's chasing: her blanket shop.  I have watched her make and create all sorts of handmade items over the years.  Her love for crafting and making is what has been my inspiration to craft things of my own. It is because of her I have the cooking, baking, and HomeEc skills that I do.  Some of my fondest memories are of the times when I was little, sitting next to her on the couch as she taught me to knit or embroider.

She has always been there to teach me everything that she knows, and she'll always be there to answer my questions in the future.  Firm yet sweet, kind and comforting, she taught me to always care for those you love, and appreciate the simple things in life above all others.  And all the while, her flowers on the fence are blooming just as brightly as the novelties coming from her own hands.


Em

Friday, June 24, 2016

Lake Hike

My family and I went for a hike in the middle of the week to a lake a couple of hours away from our house.  I woke everyone else up at five in the morning, and was ready to head out the door by six with backpack packed, extra clothes in the truck, cooler filled with goodies to make sandwiches, and breakfast sitting in my stomach.

We got out of the house about an hour later, though, because we didn't actually know where we were going until then.  We are so good at planning ahead, you see.

The road trip there was great, but I'll just jump straight to the part where we got to where we were going.  I took 85 photos that day.  Well, I actually took over 200 photos but 85 was what I was left with after editing and weeding out blurry duplicates.  I can't show you all of those photos ( as much as I would like to ), but I'll give you a good 15 of them to show you what our hike was like.

We came across a field just before we got to the beginning of the trail.  We stopped to take a look at it because we had seen some birds flying around that we wanted to get some pictures of.  Naturally, as soon we stood outside the truck, waiting for them to land somewhere, they decided they were going to be stubborn and hop around in the grasses where we couldn't see them any more.

The field was still beautiful to see though, and the flowers growing around it in random sprigs where so pretty.


Do you see the bee in the middle of this flower?  I didn't even notice he was there until I edited the photo!


We drove up the rest of the road and made it to the head of the trail.  It's almost a mile hike in just to get to the lake itself, and it's a steep mile.  From the top of the trail to where the lake is is about a 300 foot change in elevation.  It's rocky and winding all the way down, but not so hard if you're used to hiking.  If you were careful, you could hop from rock to rock on the way down and feel like a mountain goat, an expert at traversing the mountain landscape.

Speaking of the mountains, they were looking their absolute best that day.  The skies were clear and wonderfully blue all day long, the trees fresh and green, the rock white and rugged.  What more could you ask for?


It was a great sense of achievement to finally see the lake nestled down in-between the mountains.  We had a choice to go either left or right to start walking around it.  We decided to go left to start.

It was beautiful looking across the lake, seeing how clear and clean it was, and how blue.  The reflections on the water were almost perfect.  If the lake had been still, it would have been like looking into a mirror.


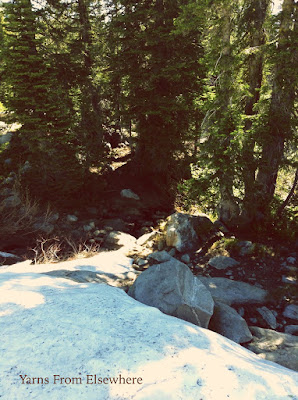
When we got around to the south side of the lake, we found that there was still snow tucked away back there.  Piles and piles of it covered the slopes, creating fun areas to slide down.  Feet spread, arms out, and with a running start, we slid down them, posed like a surfer riding the waves.  And then we got back up and did it again.

Once we got back to hiking though, these slippery slopes became a difficulty.  You had to dig your feet into the snow to be able to walk on it without falling, and even that didn't work at times.  I almost slid sideways into a creek.  My sister managed to actually slide into a tree.

I fell over far too many times, pinwheeling and digging at the snow to try and stop myself from sliding too far.  At one point my feet went right out from under me and I fell straight onto my back, sliding all the way down a little hill.  The impact was so hard that my water bottle came out of my backpack.  Instead of coming down to help me up, my mother first thought to stop and take a picture of me sprawled out on the ground where I finally came to a stop.  Such love and concern, I tell you.


When we got out of the snow and were on the west side of the lake, we found a waterfall.  It was gorgeous, and it sounded even better.


We had to hike across it, at a part where the water spilled over some rocks and was only an inch or so deep.


Then it was back up, coming around to the point where we split off and went left at first.  We had gone all the way around the lake, but now it was time to tell it goodbye.

Even though we were hiking the same trail up as we had going down, the view looked at bit different seeing it from a different angle.  It was wonderful to look between the trees and across the mountain we were on to see other mountain ranges hanging in the distance.


Going back up was obviously much harder than going down.  Where as coming down the only time we had stopped was to snap tons of photos, going up we had to stop to drink some water and take a breath or two.  Like I said before, the trail was rocky, steep, and not always clear.


It was fun though, and so great to make it back to the truck and have that feeling of "I did it!".  Down, around, and back up again made for a three mile hike altogether.  It was great.

We made some sandwiches and ate some candy bars and graham crackers, then piled in the truck to start heading back home.  As we were driving out though, we saw a little turn off to our left that we hadn't looked at before.  So we decided to make a quick detour and see what it was.

I'm so very glad we did go look at it.  It came to a flat area in the mountains behind one of the peaks.  In the dirt there we saw groundhog tunnels, the dirt pushed up where they had been digging underground.


We decided to climb up over that final peak to see what there was to see.  We found snow, which we used to make little snowmen.  This really cracked me up for some reason.  Snowmen, in the middle of June.  Who would have thought?


We found lots of flowers growing on the sides of the rocks.


But the best part of all was the view.  The air was so clear that you could see for miles.  The whole forest was spread out before us, the nearest town little dots in the valley, and way out on the distant horizon, the tips of a named mountain range we knew for certain was an hour drive away from where we were standing.

Perfect.  Just, perfect.


I worked on editing my photos on the ride home, and had every intention of creating this post that very afternoon, but I ended up being too tired.  I didn't do much else that day except lay around like a blob.  I was a very happy blob, though.  I don't think a day can get much better than that one was.

Em

Tuesday, June 21, 2016

Strawberry Moon

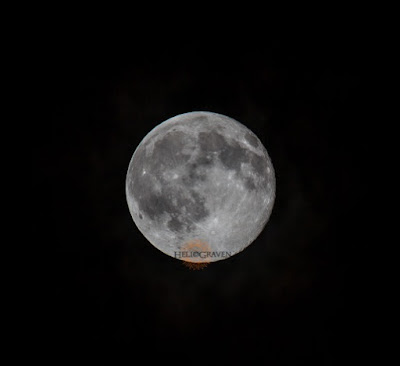
Last night there was a full moon on the summer solstice, an event that has not happened since 1967, and will not happen again till 2062.  This rare event is called a Strawberry Moon, and my daddy and I went out into the backyard last night with his camera to see it.

My father placed his water mark on the bottom of the moon.

It was well past midnight and I was tired, but seeing as this is such a rare occurrence, I wasn't about to stay in bed and miss it.  So I put my damp jeans and shoes on ( I had been running through the sprinklers just hours before, you see ), which made me a bit chilly in the otherwise nice night temperatures, and went out with him wrapped in my favorite denim jacket.

It was so bright out.  I really couldn't believe it.  I know that it was a full moon and all, but standing in the direct moon light, I could read the notes I had written on my hand to remind myself of things I have to do today.  It was almost entirely quiet, with the air conditioner coming on every now and then, and the sound of other people's sprinklers spraying.  Aside from that, it was just still, bright, and the sound of my daddy's camera clicking.

I loved to be out in my backyard wandering around in the dark.  My memory of the place is was kept me from tripping.  It might have been bright in the light of the Strawberry Moon, but in the shadows, it was pure blackness, a striking contrast that I was not expecting to see.  I was standing not ten feet away from my daddy at one point in the shadows, and he couldn't see me until I called to him.  It was really quite amazing.

I looked at our garden, at the plants sitting still in the moon light, I peeked through gates at the dark street outside and saw how the world around me was suspended in slumber and the cool night air, most likely entirely unaware of the rare, potentially once in a life time lunar event that was happening right above their resting heads.

I sat on the damp paving stones and watched the moon hang in the sky.  We, my daddy and I, didn't talk. There was no need to.  We both love nature so much, and that's all we had come out for.  Something about being outside refills our souls, and it was nice just sit out there with him and enjoy the site.

When a long strip of clouds came across the sky and got in the way of the moon, we went back in.  My mother, tired and resting in bed, was counting on us to get pictures and tell her about it all in the morning.  My sister, who I woke from her sleep, decided that she was too warm and comfy in her bed to move from it, and went back sleep.  So we show them pictures now, just as I show you.

Were you aware of this Strawberry Moon?  I, for one, had never heard of it before in my life.  If not for my daddy waking me up, I would have missed the whole thing and never been any the wiser.  I hope at least some of you knew better than I did, and that you were able to get outside, if only for a minuet, to see it with your very own eyes.

If, on the other hand, you were more like me and did not have someone to wake you, then I hope you enjoy one of the many pictures my daddy took ( and so kindly let me use ) as a second alternative to seeing the Strawberry Moon.

Em

P.S.  If you like his photo, then you should go look at his photography website ( this is the dream I mentioned him working toward in my last post ).  As of this very moment, he is still building it, but he's very, very close to launching it, so keep an eye on it in the near future!

Saturday, June 18, 2016

Skillet Birthday Cookie

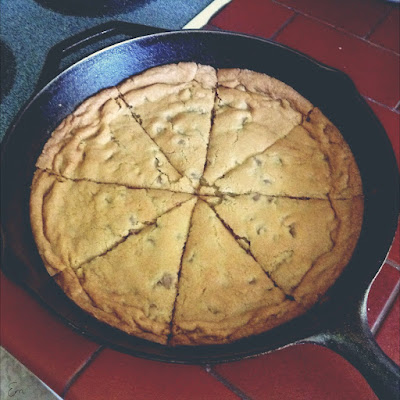
I had the wonderful pleasure of waking up early this morning to make my daddy not just one, but two skillet cookies for his birthday.  He has never been big on sweet cakes loaded down with lots of frosting, but skillet cookies are something that he just can't get enough of.


I used Martha Stewart's chocolate chip skillet cookie recipe, with extra butter smeared into the cast iron before it got put into the oven, because really, there can never be enough butter.  If you're wondering why I had to make two instead of just one, well, let me just remind you that my family and I are piranhas.  There's just over half of one left as I type this.  I'd bet my spleen that even that will be gone by breakfast tomorrow.

All in all, it was a wonderful day spent relaxing at home, baking, tinkering with the truck, drinking iced tea, and of course, eating slices of cookie.  We made him one of his favorite meals for dinner, pulled pork quesadillas with homemade guacamole.  It's a bit of a tradition of ours to let the birthday person pick out what they would like to have made for them for dinner.

It made me smile to look out our kitchen window over the tops of the neighborhood houses and see the sunset lit up with my daddy's favorite color: orange.  Everyone around my house is currently chasing some dream or goal of their's, determined to make it work.  Call it silly, but it felt sort of special to have his favorite color in the sky to end his special day, especially with all the hard work he's been doing lately to reach his dreams.


My daddy is just as silly as he is wise, and just as loving as he strong.  He taught me to dream, and to work hard, to smile, and to look for the hidden beauty in everything in nature around me.  He never complained when he had to hum to me for hours at a time at 3 in the morning just to get me to fall asleep when I was a baby, and he never failed to share his food with me even though he just got home from a 12 hour shift and was starving himself ( because as a toddler, everything tastes better coming from someone else's plate, right? ).

He's always been by my side, I know that we still have plenty of adventures left to go on.

:)

Em

Friday, June 17, 2016

DIY Shoelaces : Tutorial


Making your own shoelaces is one of the simplest yet cutest things you can do.  So easy, such a minimal amount of work, and yet such a large statement to your personality.  Besides all that, they look great!  You can pick out any color, any print, or pull out all your scraps and make a pair of mismatched mashup laces.  Whatever the end result, they'll always look better then the ones from the store.

This is a very simple project to do, as it requires no fixed or ultra complicated pattern to puzzle over, and can be done in only five simple steps.


  1. Cut fabric
  2. Stitch fabric
  3. Iron fabric
  4. Cut fabric again
  5. Stitch fabric once more
  • Bonus step: celebrate with chocolate

And that's it folks!  It's as easy as that.  Perfect for beginners or the seasoned sewer who is itching for some stitching but doesn't have all the time they need to completely redo all the curtains and cushions in the house. So let's get started, shall we?


Materials
  • A shoelace from your shoe ( used to make new and improved shoelaces the right length )
  • Scrap fabric ( enough to cut as many 1 1/2 inch wide strips you need to get the length of your old shoelace )
  • Thread to match your fabric, or contrast it!

Step 1: Cut Fabric

Once you have your desired fabric picked out, it's time to figure out how many strips you need to cut from it in order to get the require length for your shoelaces.  This is the part where your old, store bought laces come in handy ( clearly the only part in their lifespan when they are truly useful ).

Measure your old laces to see how many inches long they are, then, find the longest side of your fabric, and measure how long it is.  Do some simple math, length of old lace (L) ÷  length of longest side of fabric (F) x 2 = number of strips needed (S).

Did that look like some not-so-simple-math?  Well good, I was looking to confuse you and thus make myself seem smarter.  Did that not look like some not-so-simple-math?  Well then touché my friend, touché.

All that really says is that if your shoelace is 10 inches long, and your fabric is 5 inches long, then you are going to need 2 strips of fabric for one shoelace, and 4 strips of fabric altogether because you really do need two shoelaces in order to wear your shoes properly.

( Obviously no one would have shoelaces that short unless maybe you're a brownie or something but it was just for mathematical simplicity. )

Or you could be a little rebel like me and guess-ta-mate the whole thing by laying the old shoelace next to the fabric and making random calculations ( see below ).


Find the straightest side of your fabric, or make a straight side if necessary, and start cutting from it.  Your strips need to be 1 1/2 inches wide.  Make your marks on the wrong side of the fabric so you won't see them.


Then snip away!  Marvel at how nice and uniform all your strips look when you are done.


Step 2: Stitch Fabric

Now those strips aren't long enough hanging out all by themselves.  They need to be brought together, forcefully, if needed, before they can begin their journey to becoming the shoelaces of your dreams.

Sew all your short strips together, end to end, matching the small sides up and keeping the right sides of the fabric facing, till you have just one very long strip of fabric.  Use a 1/2 inch seam allowance, a.k.a. right along the presser foot.


Step 3: Iron Fabric

Ah, the longest step is now upon us.  Can you believe that you're about to spend more time ironing then actually sewing?  Should we really be calling this a sewing project, then?  Or should we be questioning the origins of the given name?

Or, better yet, let's not be getting philosophical over shoelaces.

Pull out your music, find somewhere comfy to sit, and suck it up buttercup.  Start by pressing your short seams out flat.  Don't press them left or press them right.  Open them up so that there is less bulk to stitch through later.


Then iron the whole thing in half, wrong sides facing.  This seam doesn't have to be particularly crisp, but it does have to be right down the middle.


Now unfold your crease!

I can hear you complaining from here.

"Well then why did I just spent the time to make the long crease?!"

Because it's a guide line, honey.  Don't get too upset.


Pick a side, any side, and fold the edge over to meet the crease in the middle of your strip ( remember,  keep the wrong sides facing ).  It does help at this point to make a crisp seam.  For help in achieving this, I recommend a spray bottle filled with plain old water you can spritz your strip with to make it steam when ironed.


Then fold over the other side of the fabric, matching the edge to the middle crease just as before.


Now the whole thing get's ironed in half again!  Remember that first middle crease you made all those years ago ( or at least it feels like years after all that ironing )?  Well now you get to reacquaint yourself with it.  No longer a mere guideline, it is now the finishing crease to your shoelace.  Crispness is of the essence here, so I would really, really encourage you to spritz water and create steam for this crease.


Step 4: Cut Fabric Again

Ah, look at it.  Doesn't it look like a shoelace already?  It certainly is one long shoelace though.  We need to turn it into two, more reasonably sized shoelaces.

If you measured you old shoelace and you know just how long you need your new shoelaces to be ( say we're still talking with that brownie ( no, not brownie, I mean a brownie ) who's laces are 10 inches long ), then measure 10 inches off of your long, very nicely ironed strip and cut.  Make this measurement and cut again, because remember, we need two of these things.

Or rebel again ( like me ) and guess-ta-mate the whole thing ( see below ).


Step 5: Stitch Fabric Once More

Just two more long seams and you're done!  So close now that you can see the light.

All you have to do to finish your shoelace is seam it up almost right down the middle to keep it from unfolding.  I say almost, because you do want to slightly favor the open side of the lace.  It's a very tiny seam allowance.  So tiny, I did not even measure it.  Just go slow ( -ish ) and keep it as straight as you can ( don't forget to backstitch! ).


Oh, look at those shoelaces!  Aren't they just glorious?!  Of course they are!  They came from your hands!  Now rustle up your shoes and lace them up.  Beam with pride at how neat and awesome they look.  And then show them off, everywhere, and to everyone.  Causally stick your feet out from under the table so that people may see them.  Bop right down to Electric Avenue and own the street.  And, most importantly, let everyone know where they can learn to make such wonderful creations themselves.


BONUS STEP: Celebrate With Chocolate

Or cookies.  Or chocolate and cookies.  Or a full blown batch of chocolate cookies.  Mmm, yes.  I can smell them baking now.

However you decide to celebrate, you should be very proud of yourself.  Your shoes now look great with your handmade laces, and reflect your own personal style in way that store bought laces just aren't able to.  So to you, I say this; Well done my friend, well done.

( Just don't start singing These Boots Are Made For Walkin'.  This might annoy those close to you.  Not that I would know from experience or anything. )

Em